Quick answer: Laptop Keys vs. Mechanical Keyboard Caps: A Comparison
| Feature | Laptop / Membrane Keyboard |
|---|---|
| Primary Component | Keycap + Plastic Retainer Hinge |
| Replacement Difficulty | Moderate (hinge can be tricky) |
| Interchangeability | Extremely model-specific. Keys for a Dell Inspiron 15 will not fit an HP 15-BA. |
| Common Failure | Broken plastic pins on the retainer hinge. |
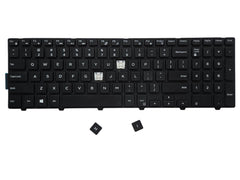
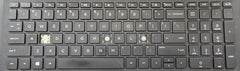
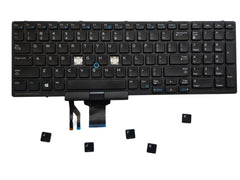
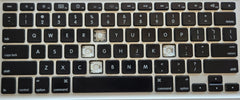
That feeling of dread when a keycap pops off, a key stops responding, or your cat decides one is a chew toy. We’ve all been there. Your first thought might be, "Well, time for a new keyboard." But what if we told you that a full replacement is often unnecessary? A keyboard keys replacement is an easy, affordable fix that can get your board back to 100% functionality. This guide will walk you through everything you need to know, from identifying the parts to snapping that new key into place.
Is Keyboard Key Replacement Actually Possible?
Yes, in most cases, replacing a single key or a few keys is absolutely possible! It's a common repair for both laptop keyboards and external desktop keyboards (both mechanical and membrane). Rather than replacing an entire $100+ keyboard assembly, you can often fix the issue for just a few dollars.
It’s important to distinguish between the parts:
- The Keycap: This is the plastic piece with the letter printed on it that your finger touches.
- The Retainer Hinge: On laptops and many non-mechanical keyboards, this is a delicate, scissor-like plastic piece that holds the keycap and allows it to pop up and down. This is the most common point of failure.
- The Switch: On a mechanical keyboard, this is the entire mechanism underneath the keycap that registers the keystroke.
For most simple cosmetic issues or when a keycap gets lost, it's an easy swap. If the underlying hinge is broken, the repair is a bit more delicate but still very manageable. The process is a cost-effective way to extend the life of your equipment significantly.
Understanding Your Keyboard's Anatomy
Before you can fix it, you need to know what you're looking at. Popping a key off without understanding the mechanism is a surefire way to break it. Here’s a breakdown of the typical components from top to bottom.
The Keycap
This is the top-most part, the physical button you press. It has a stem or clips on the underside that attach to the components below. These are usually made of ABS or PBT plastic and can be easily replaced, especially on mechanical keyboards.
The Retainer Hinge (or "Scissor Clip")
This is the crucial component for most laptop and chiclet-style keyboards. It's a small, intricate plastic assembly of one or two pieces that snap together and attach to both the keyboard base and the underside of the keycap. When a key feels loose or won't stay on, it's almost always because one of the tiny pins on this hinge has broken.
The Silicone Dome (or Rubber Cup)
Directly under the hinge is a small rubber cup. This simple part provides the "spring" or tactile feedback for non-mechanical keys. When you press down, the dome collapses to complete a circuit on the keyboard's membrane, and when you release, it pushes the key back up. These can sometimes be dislodged but are rarely the point of failure.
Mechanical Switches
Mechanical keyboards are a different beast. Instead of a membrane and dome, each key has its own complete mechanical switch. Popular brands include Cherry, Gateron, and Kailh. Replacing a keycap on a mechanical board is as simple as pulling it off (preferably with a tool) and pushing a new one on. Replacing the entire switch is a more involved process that requires soldering, but just replacing the cap is incredibly simple.
How to Perform a Keyboard Keys Replacement (Step-by-Step)
Ready to get hands-on? Follow these steps carefully for a successful keyboard keys replacement. This process is primarily for laptop or non-mechanical keyboards with a hinge mechanism.
Step 1: Identify Your Exact Laptop/Keyboard Model
This is the most important step. There is no "one-size-fits-all" key. A key from a Dell Inspiron will not fit on a MacBook, and a key from one HP model may not even fit on another. Look for a model number on the bottom of your laptop or keyboard. Be as specific as possible.
Once you have the model, you need to identify the hinge type. It's wise to take a clear, well-lit photo of the area where the key is missing. Retailers of replacement keys often show pictures of the hinge types they sell, allowing you to match yours perfectly.
Step 2: Gather Your Tools
You don't need a massive toolkit. All you really need is:
- A thin, flat tool for prying (a small flathead screwdriver, a plastic spudger, or even a guitar pick).
- A pair of tweezers for handling the delicate hinge clips.
- A can of compressed air or a soft brush for cleaning.
Step 3: Remove the Damaged Key and Hinge
If the keycap is still loosely attached, slide your pry tool under one of the top corners and gently twist. The keycap should pop off. Do not use brute force. Once the cap is off, use tweezers to carefully remove any broken pieces of the old plastic hinge. Pay close attention to how the old one was hooked in—it will help you orient the new one.
Step 4: Clean the Key Socket
With the area exposed, use compressed air or a soft brush to blow away any dust, crumbs, or debris. A clean surface is essential for the new key to sit properly and function without sticking.
Step 5: Install the New Retainer Hinge
This is the trickiest part. A new hinge will come in one or two pieces. If two, you must snap them together first to form the "scissor" shape. Then, you need to hook the tiny pins on the hinge into the corresponding metal or plastic loops on the keyboard base. It may take a few tries. Use your tweezers to gently maneuver it. Once the bottom part is hooked in, press the top part down until it clicks securely into the other loops.
Step 6: Attach the New Keycap
With the hinge in place and the rubber cup centered underneath it, you can now attach the new keycap. Simply align it over the hinge, making sure it’s straight, and press down firmly and evenly with your thumb. You should hear a satisfying "snap" or "click" as the cap locks onto the hinge. Test the key—it should depress smoothly and pop back up just like its neighbors.
Laptop Keys vs. Mechanical Keyboard Caps: A Comparison
The replacement process differs quite a bit between standard laptop keyboards and enthusiast-grade mechanical keyboards. Understanding the difference is key to knowing what you need to buy.
| Feature | Laptop / Membrane Keyboard | Mechanical Keyboard |
|---|---|---|
| Primary Component | Keycap + Plastic Retainer Hinge | Keycap + Switch Stem |
| Replacement Difficulty | Moderate (hinge can be tricky) | Easy (keycap puller recommended) |
| Interchangeability | Extremely model-specific. Keys for a Dell Inspiron 15 will not fit an HP 15-BA. | Highly interchangeable. Most keycaps fit a standard Cherry MX-style stem. |
| Common Failure | Broken plastic pins on the retainer hinge. | Worn/shiny keycap surface (ABS plastic), or a failing switch (chattering/no response). |
Where to Buy Quality Keyboard Replacement Parts
Finding the right part is the most critical phase of your keyboard keys replacement project. While generic kits exist, they rarely fit perfectly. You need parts that are specifically designed for your device. At Tech Spare Warehouse, we specialize in providing high-quality, model-specific components to get your gear back in perfect working order.
Instead of trawling through auction sites, you can find exactly what you need in our catalog. We stock a huge variety of individual keys for countless models.
- For instance, if you have a common HP laptop, we offer individual key replacements for HP Pavilion series keyboards.
- Working on a business-class Dell? We have you covered with replacement keys for the Dell Latitude E5550 and E5570.
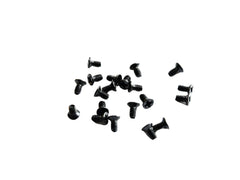
- Mac users can restore their machines with parts like keycaps for the MacBook Pro A1286 or even bulk keyboard screws for Unibody MacBook Pros for larger-scale repairs.
- We even support less common models, like our keycap kits for Samsung ultrabooks.
- And for the growing community of mechanical keyboard modders, we carry specialty items like our M2 x 4mm machine screws for the Wooting 80HE, perfect for a case swap or full rebuild.
When a Full Keyboard Replacement is Unavoidable
While single key replacement is a fantastic solution, there are times when it’s not the right one. You should consider replacing the entire keyboard assembly if:
- There is significant liquid damage. Spilling a drink across the whole board can fry the underlying membrane circuits. One sticky key is fixable, but 20 sticky keys means the damage is widespread.
- Multiple, random keys are failing. If keys that are not near each other start to malfunction, it often points to a problem with the keyboard controller or a damaged ribbon cable, not the individual keys.
- The keyboard chassis is physically damaged. If the base itself is cracked or warped, new keys may not be able to clip in securely.
- Parts are unavailable. For very old, rare, or obscure devices, it can sometimes be impossible to source reliable replacement hinges and keycaps.
A keyboard key replacement isn't just a repair—it's a smart, sustainable way to maintain your electronics. It saves you money, reduces electronic waste, and empowers you with the knowledge to fix your own gear. By carefully identifying your keyboard model and getting the correct parts, you can easily solve one of the most common hardware frustrations.
Don't let one broken key ruin your productivity. For all your repair needs, from a single keycap to any other electronic spare parts, explore our extensive inventory at Tech Spare Warehouse and get the right part for the job.
Frequently Asked Questions
How much does it cost to replace a keyboard key?
The cost is minimal compared to a new keyboard. A single replacement key kit, which includes the keycap and hinge mechanism, typically costs between $4 and $10, depending on the rarity of the laptop model.
Can I replace just one key on a laptop?
Absolutely. In fact, this is the most common type of keyboard repair. As long as the damage is limited to the keycap or its plastic hinge, you can replace a single key without affecting the rest of the keyboard.
What tools do I need to replace a keycap?
You only need simple tools. A thin, flat object like a plastic spudger, a small flathead screwdriver, or a guitar pick is used for prying. A pair of tweezers is also highly recommended for handling the small, delicate retainer hinge.
How do I know which replacement key to buy?
You must identify your laptop's specific model number (usually found on the bottom case). Then, you should compare the plastic hinge mechanism under your keycap to the photos provided by the seller to ensure an exact match. Hinge types can vary even on the same laptop model.
Is it easier to replace a key on a mechanical or laptop keyboard?
It is significantly easier on a mechanical keyboard if you are only replacing the keycap. It just pulls off and a new one pushes on. A laptop key is more delicate due to the intricate plastic hinge that must be assembled and clipped into place correctly.
My spacebar feels wobbly after replacing it, why?
The spacebar, and other large keys like Enter and Shift, have an additional metal support bar under the keycap. This bar must be properly clipped into both the keyboard base and the keycap itself. If it's wobbly, the bar is likely not seated correctly in all its clips.