Quick answer: PC Screw Comparison Table
| Screw Type | Typical Use | Thread Size |
|---|---|---|
| M3 Screw | Motherboard Mounting, 3.5" HDDs, Optical Drives | M3 |
| #6-32 Screw | Case Panels, Power Supply Mounting, 3.5" HDDs | #6-32 |
| M2 Screw | M.2 SSDs, Laptop Components | M2 |
| Fan Screws | Case Fans | Self-Tapping |
| M2.5 Screw | Raspberry Pi Cases, Some Electronics | M2.5 |
Getting your motherboard mounting screws right is one of the most critical steps in any PC build. These tiny pieces of metal are all that stand between your expensive motherboard and a catastrophic short circuit. The direct answer is that you need to use specific screws, #6-32 or M3 depending on the case, in conjunction with standoffs to safely secure your motherboard to the computer case. Using the wrong screw or forgetting a standoff can lead to irreversible damage. This guide will walk you through everything you need to know to do it right the first time.
Shop the screws in this guide
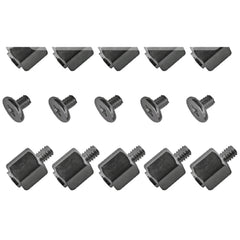
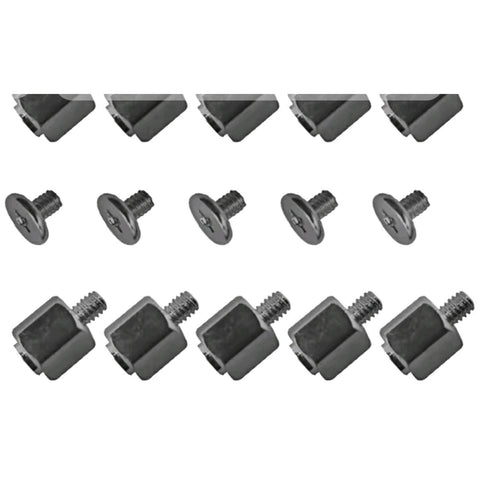
 M.2 Standoff + Screw Kit, 10 Sets (Black)View & buy →
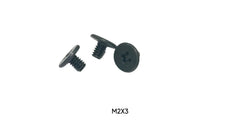
 M2 x 3mm M.2 Slot Screws, 100-PackView & buy →
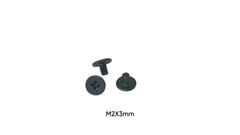
 M2 x 3mm Laptop Motherboard Screws, 50 or 100View & buy →
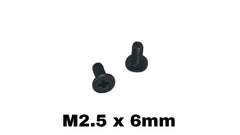
 M2.5 x 6mm Laptop Motherboard Screws, 10-PackView & buy →
For the M.2 slot and laptop boards (we don't stock desktop M3 / #6-32 motherboard screws). See laptop internal screws and M.2 SSD screws.
What Are Motherboard Mounting Screws?
Motherboard mounting screws are small fasteners designed specifically to hold a motherboard securely inside a PC case. Their job is twofold: to physically anchor the board so it doesn’t move, and to ensure it remains electrically isolated from the metal chassis of the case. This electrical isolation is actually handled by another crucial component that works in tandem with the screws: the standoff.
Standoffs are small, typically brass, hexagonal posts that are screwed into the case first. The motherboard then sits on top of these standoffs, and the mounting screws are threaded down through the board's mounting holes and into the standoffs. This creates a vital air gap, preventing the thousands of solder points on the back of the motherboard from touching the case and causing a massive short circuit. Think of them as the foundation of your build; without them, the entire structure fails.
Anatomy of PC Building Screws: Types and Sizes
Not all PC screws are created equal. Using the wrong one can lead to stripped threads or, worse, damaged components. Here’s a breakdown of the common types you'll encounter.
The Standard: M3 Screws
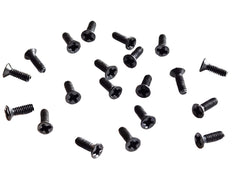
The vast majority of modern motherboards are secured using M3 threaded screws. "M3" refers to the metric thread size: a 3mm nominal diameter. These screws typically have a Phillips head and may have a rounded or "pan" head profile. Your computer case will almost always include a small bag of these exact screws. It’s crucial to use these and not any other type for mounting the motherboard itself. While M3 screws are a standard, they come in different lengths and materials.
Standoffs: The Unsung Heroes
We’ve mentioned them already, but it's worth repeating: standoffs are not optional. These are typically hexagonal posts with two threads: a male thread on one end that screws into the case's motherboard tray, and a female thread on the other to accept the M3 mounting screw. The standard thread for the case-side is usually #6-32, while the motherboard screw side is M3. Always ensure you have a standoff installed for every screw you intend to use.
A Note on M.2 and Other Screws
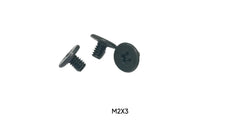
As components have gotten smaller, so have their fasteners. The most common place you'll see a different screw type on a motherboard is for securing an M.2 solid-state drive (SSD). These use a much smaller screw, typically an M2 screw. Trying to force an M3 motherboard screw into an M.2 slot will destroy it. Always use the right screw for the job. If you've lost your M.2 screw (a very common problem!), you can find replacements. We offer a wide variety of fasteners, including M2 x 4mm Phillips screws specifically for SSD mounting. These smaller M2 screws are also used in laptops and other compact devices, like these M2 x 5mm screws for a Dell Inspiron 3535 case.
How to Install a Motherboard Correctly
Installing the motherboard is a moment of truth in any PC build. Follow these steps carefully to ensure a safe and secure installation.
- Prepare Your Case: Before you even think about the motherboard, install the I/O shield. This is the thin metal plate that frames your motherboard's rear ports (USB, Ethernet, etc.). It’s much easier to snap it into the case now than when the board is in the way.
- Install Standoffs: Look at your motherboard and identify all its mounting holes (they have a silver or gold ring around them). Now, look at your case's motherboard tray. Match the holes on the board to the threaded holes in the tray and install a standoff in each corresponding location. Your case may even have a small tool to help you tighten them.
- Align the Motherboard: Gently lower the motherboard onto the standoffs, aligning the mounting holes. The I/O shield ports should slide neatly into their cutouts. Don't force it; if it doesn't align, check your standoffs again.
- Start the Screws: Begin by threading in the center screw first. This will hold the board in place while you work on the others. Screw it in by hand until it's just snug, but do not fully tighten it yet. Do the same for all other screws.
- Use the Cross-Pattern: Once all screws are partially threaded, begin to tighten them fully. Use a cross or star pattern, similar to changing a car tire. Tighten the center screw, then one in a corner, then the opposite corner, and so on. This ensures even pressure across the board and prevents warping.
- Final Tightness Check: The screws should be "finger tight." You don't need to apply immense force. The goal is to hold the board securely, not to weld it to the case. Overtightening can crack the motherboard PCB.
Common Mistakes to Avoid
Many first-time builders (and even some experienced ones) make simple mistakes during this stage. Here are the most common pitfalls:
- Forgetting Standoffs: This is the cardinal sin. Placing a motherboard directly against the metal case tray will cause a short circuit the moment you power it on, frying the board and potentially other components.
- Using the Wrong Screws: Grabbing a coarser #6-32 screw (often used for case panels and power supplies) and trying to force it into an M3 standoff will strip the threads. Keep your screws organized!
- Overtightening: A motherboard is a delicate piece of electronics. Cranking down on the screws with excessive force can cause microscopic cracks in the PCB, leading to stability issues or outright failure down the line.
- Missing Screws: While you don't always need to use every single mounting hole, you should use enough to ensure the board is fully supported and doesn't flex, especially around the PCIe slots and RAM slots where you'll be applying pressure. A minimum of 6 screws is recommended for a standard ATX board.
- Extra Standoffs: Just as bad as missing standoffs is having an extra one in a location where there is no corresponding mounting hole on the motherboard. This stray standoff can press against the back of the board and cause a short.
PC Screw Comparison Table
To help visualize the differences, here is a simple table of common screws found in a PC build.
| Screw Type | Typical Use | Thread Size |
|---|---|---|
| M3 Screw | Motherboard Mounting, 3.5" HDDs, Optical Drives | M3 |
| #6-32 Screw | Case Panels, Power Supply Mounting, 3.5" HDDs | #6-32 |
| M2 Screw | M.2 SSDs, Laptop Components | M2 |
| Fan Screws | Case Fans | Self-Tapping |
| M2.5 Screw | Raspberry Pi Cases, Some Electronics | M2.5 |
Where to Buy PC Screws and Fasteners
While most cases come with an adequate supply of screws, they are notoriously easy to lose. Moreover, if you are working on custom projects, laptops, or second-hand builds, you will almost certainly need to source your own fasteners. At Tech Spare Warehouse, we know that having the right screw is essential.
For the M.2 slot on your motherboard, we stock M2 x 3mm screws in a 100-pack, the M.2 SSD install kit and an M.2 standoff and screw kit (10 sets). For laptop boards, see laptop internal screws.
Conclusion: The Small Parts That Matter Most
In the grand scheme of a multi-thousand-dollar PC build, a handful of screws might seem insignificant. But as we've seen, the humble motherboard mounting screws are one of the most structurally and electrically important components in your entire system. By understanding the role of standoffs, using the correct M3 thread size, tightening them properly, and avoiding common mistakes, you ensure the health and longevity of your motherboard. Don't cut corners on the small stuff. For all your specialized electronic component and spare part needs, from the tiniest screw to the most complex board, be sure to check out the full catalog at Tech Spare Warehouse.
Fitting the standoffs themselves? Follow how to install motherboard and M.2 standoffs, step by step.
Frequently Asked Questions
What size are motherboard mounting screws?
The standard size for motherboard mounting screws is M3, which stands for a metric 3mm thread. The standoffs they screw into usually have an M3 female thread.
Can I build a PC without motherboard screws?
Absolutely not. You must use screws and standoffs to securely mount the motherboard. Without them, the board would be loose in the case and would immediately short circuit against the metal chassis, destroying it.
Are motherboard screws and standoff screws the same?
No. Motherboard screws are typically M3 screws that go through the motherboard into the standoff. Standoffs have two ends: one that accepts the M3 motherboard screw, and another (often a #6-32 thread) that screws into the computer case itself.
What happens if I forget a standoff?
If you forget a standoff and try to install a screw in that hole, the back of the motherboard will make contact with the metal case tray. This creates a short circuit that can permanently damage the motherboard and other connected components when you power on the system.
How many screws do I need for my motherboard?
This depends on the motherboard's form factor (ATX, Micro-ATX, etc.). A standard ATX board usually has 9 mounting holes. While you don't have to use all of them, it is highly recommended to use at least 6 to ensure the board is stable and doesn't flex.
Do motherboards come with mounting screws?
Usually, no. The motherboard mounting screws and standoffs are almost always included with the computer case, not the motherboard itself. If you buy a used case or lose the original screws, you will need to purchase them separately.
Can I use other types of screws to mount my motherboard?
You should never do this. Using a screw with a different thread (like a #6-32 case screw) will strip the threads in the standoff, and using a screw that is too long can damage the motherboard. Only use the correct M3 screws designed for this purpose.