Quick answer: Butterfly vs. Scissor Switch (Magic Keyboard)
| Keyboard Type | MacBook Models |
|---|---|
| Butterfly | MacBook (Retina, 12-inch, 2015–2017), MacBook Pro (2016–2019), MacBook Air (2018–2019) |
| Scissor Switch (Magic Keyboard) | MacBook Pro (late 2019-present), MacBook Air (2020-present), and all models pre-2016 |
Has a sticky, missing, or broken keycap turned your typing experience into a frustrating ordeal? You're not alone. The good news is that you can often perform a MacBook key replacement right at home. It's a surprisingly straightforward and cost-effective fix that can save you hundreds of dollars compared to a service center repair. This guide provides everything you need to know, from identifying your keyboard type to successfully installing the new key.
Is DIY MacBook Key Replacement Right for You?
Before you roll up your sleeves and start popping off keycaps, it's important to assess the situation. A do-it-yourself repair is ideal for isolated issues where a single keycap is physically broken, the underlying clip is damaged, or a key has simply popped off and been lost.
Deciding to do it yourself has significant benefits, primarily cost and speed. You can order a replacement kit for a few dollars and have the repair done in under 30 minutes. It's also an incredibly satisfying fix that puts you in control of your own hardware.
However, if the problem is more severe, a DIY approach might not be the answer. If you've had a major liquid spill, if multiple keys are failing in a specific pattern, or if the key isn't registering because of a logic board issue, a single key replacement won't solve the problem. In these cases, a full keyboard or top case replacement is likely necessary, which can be a much more involved and expensive repair.
Identifying Your MacBook's Keyboard Type
The single most important step in this process is identifying which type of keyboard your MacBook uses. Apple has used two primary switch mechanisms in its modern laptops, and the replacement parts are not interchangeable. You can find your MacBook's model and year by clicking the Apple icon in the top-left of your screen and selecting "About This Mac".
Butterfly vs. Scissor Switch (Magic Keyboard)
From 2015 to 2019, Apple used a controversial "Butterfly" mechanism. It was designed to be thinner, but it's notoriously fragile and prone to failure from even small amounts of dust. Starting in late 2019, Apple reverted to a more traditional and reliable "Scissor Switch" design, which they branded the "Magic Keyboard."
Here’s a quick breakdown to help you identify yours:
| Keyboard Type | MacBook Models | Key Feel & Travel | Repairability |
|---|---|---|---|
| Butterfly | MacBook (Retina, 12-inch, 2015–2017), MacBook Pro (2016–2019), MacBook Air (2018–2019) | Extremely short travel, crisp but gets stuck easily | Difficult; the clips are one piece and extremely fragile. High risk of breaking retainer tabs on the keyboard base. |
| Scissor Switch (Magic Keyboard) | MacBook Pro (late 2019-present), MacBook Air (2020-present), and all models pre-2016 | More key travel, stable, and much more reliable | Moderate; two-piece clips are more robust and forgiving to work with. |
What You'll Need: Tools & Parts
To perform a clean and successful key replacement, you'll want to have a few specific tools on hand. Using the wrong tools (like a metal screwdriver) can lead to scratches and permanent damage.
- A Replacement Key Kit: This should include the keycap (the part you press), the retainer clip/hinge (the plastic mechanism), and sometimes the rubber cup. Ensure it is for your exact MacBook model and year.
- A Thin Plastic Pry Tool (Spudger): This is essential for safely prying off the keycap and hinge pieces without scratching your laptop.
- Fine-Pointed Tweezers: Invaluable for manipulating the small retainer clip pieces.
- Canned Air: For blowing out dust and debris from under the key.
- Isopropyl Alcohol & Cotton Swabs: For cleaning any sticky residue.
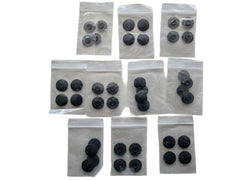
While you're working on your laptop, it's a great time to do a quick health check. You might notice that your MacBook is missing some of its rubber feet or that some case screws are loose or gone. Keeping your machine in top shape, inside and out, is crucial. For instance, replacing worn Bottom Base Rubber Feet on older MacBook Pros can prevent it from sliding and improve airflow.
Step-by-Step Guide to Replacing a MacBook Key
Ready to get started? Find a clean, well-lit workspace and take your time. Rushing is how mistakes happen. This process can be fiddly, so patience is key.
Step 1: Power Down and Prepare
Completely shut down your MacBook. This prevents any accidental key presses from causing issues. Set up your tools on a non-scratch surface.
Step 2: Carefully Remove the Old Keycap
The technique varies slightly based on the key type. For scissor-switch keys, gently slide your spudger under the top edge of the keycap and slowly pry upwards. You should hear a faint click as it detaches. Be extra gentle with Butterfly keys, as the clips are much more delicate.
Step 3: Remove the Retainer Clip (Hinge)
This is often the trickiest part. The retainer clip is a small, multi-part plastic piece. Examine how it's attached. Use your tweezers to carefully unhook it from the metal tabs on the keyboard base. Take a picture with your phone before you remove it so you have a reference for how the new one should look.
Step 4: Clean the Area Thoroughly
With the keycap and clip removed, use your can of compressed air to blow out any dust or crumbs. If there is sticky residue from a spill, dip a cotton swab in a small amount of isopropyl alcohol and carefully clean the base and rubber cup. Let it dry completely.
Step 5: Install the New Retainer Clip
If your new clip is in two pieces, snap them together first. Then, using your tweezers, carefully hook the new clip onto the metal tabs on the keyboard base. It should lie flat and feel secure. This is where your reference photo comes in handy!
Step 6: Attach the New Keycap
Position the new keycap directly over the retainer clip. Ensure it is aligned perfectly. Press down firmly and evenly in the center. You should hear and feel a satisfying "click" as the keycap snaps onto the clip. Test the key to make sure it depresses and springs back correctly.
Common Mistakes to Avoid
Avoid these common pitfalls to ensure your repair goes smoothly:
- Using Too Much Force: The clips and the tabs that hold them are plastic. If you force something and it breaks a tab on the keyboard base, the entire keyboard assembly will need to be replaced. Be gentle.
- Ordering the Wrong Part: There are dozens of variations of MacBook keys. Double and triple-check your model number and year before ordering a replacement kit.
- Using Metal Tools: A flathead screwdriver will scratch your keycaps and the aluminum body of your MacBook. Stick to plastic tools.
- Not Cleaning Properly: If you don't remove the dirt or sticky residue, your new key will feel just as bad as the old one.
Where to Buy MacBook Repair Parts
Finding the individual MacBook keycap kits often requires going to a specialized online vendor. However, a successful repair often involves more than just the key itself. At Tech Spare Warehouse, we specialize in providing the high-quality components you need to complete your electronics repairs like a pro.
While undertaking a MacBook key replacement, you might find other small parts are missing or worn. That's where we come in. A complete repair means ensuring everything is secure.
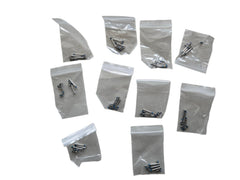
- Bottom Case Screws: It's incredibly common for these to go missing over time. Secure your device with a new set of Bottom Case Screws compatible with classic MacBook Pro models.
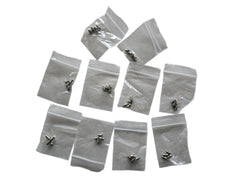
- Hard Drive Mounting Screws: If you've ever upgraded your storage, you know how easy it is to lose these tiny screws. We stock SSD/HDD Mounting Screws for MacBook Pros to keep your drive from rattling around.
- Replacement Feet: Is your MacBook wobbly? Replace worn-out feet with a fresh set for Retina MacBook models A1425, A1502, and A1398 to restore stability.
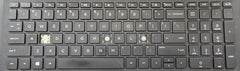
- Laptop Keycaps For Other Brands: While key mechanisms are unique, the repair process is similar across brands. We also support other machines with parts like our Individual Laptop Keyboard Keycaps for the HP 15-BA Series.
Conclusion: Your Keyboard, Restored
A faulty keyboard doesn't have to be the end of your MacBook's life. By correctly identifying your keyboard type, gathering the right tools, and proceeding with a gentle, patient approach, you can successfully complete a MacBook key replacement. This small repair restores the full functionality and feel of your machine, saving you time and money while extending the life of your device.
For all your other computer hardware and spare part needs, from tiny screws to essential brackets, browse the full catalog at Tech Spare Warehouse and get the quality components you can rely on.
Frequently Asked Questions
How much does it cost to replace a MacBook key?
A DIY MacBook key replacement is very affordable. You can typically buy a single key kit online for $5 to $10. In contrast, taking it to Apple for service can be expensive, as they often replace the entire top case assembly for a single broken key, a repair that can cost $400 to $600 or more.
Can I replace a key on a MacBook with a butterfly keyboard?
Yes, it is possible, but it is extremely challenging. The butterfly mechanism is exceptionally fragile, and the risk of breaking the clip or the tabs on the keyboard base is very high. Apple previously had a keyboard service program for these models, but it has expired for most devices. If you attempt this repair, proceed with extreme caution.
What's the difference between a keycap and a retainer clip?
The keycap is the square plastic cover that you type on, which has the letter or symbol printed on it. The retainer clip (also called a hinge) is the small, delicate plastic mechanism underneath the keycap. It attaches the keycap to the keyboard and is responsible for the up-and-down motion.
Is the spacebar replaced the same way as a letter key?
No, the process is more complex for larger keys. The spacebar, shift, enter, and delete keys have an additional metal stabilizer bar under the retainer clip. This bar must be properly seated along with the clip for the key to function without wobbling, making these keys more difficult to replace.
What if I broke the small plastic tabs on the keyboard base?
If the small hooks or tabs on the keyboard assembly itself (which hold the retainer clip in place) are broken, a single key replacement is no longer possible. Unfortunately, this damage is irreversible and requires a full top case replacement, which includes the entire keyboard assembly.
Where can I find my MacBook's model number?
Your MacBook's model number (e.g., A1706, A2338) is printed in small text on the bottom case of the laptop, usually near the hinge. You will need this specific number to ensure you order the correct replacement key kit for your device.
Does liquid damage just affect one key?
It is highly unlikely. If a key stopped working after a liquid spill, the damage is almost certainly more widespread. Liquid seeps under the keys and damages the sensitive membrane or electronic traces of the keyboard circuit. A single key replacement will not fix this; the device needs professional assessment and likely a full keyboard replacement.