Quick answer — M2 screw dimensions:
- Thread (major) diameter: 2.0mm (calipers read 1.98–2.02mm)
- Thread pitch: 0.4mm (10 threads = 4mm)
- Minor (core) diameter: about 1.6mm
- Head diameter: about 3.8–4mm on standard ISO pan and flat heads; socket heads use a 1.5mm hex key
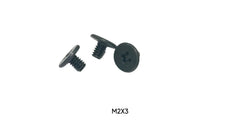
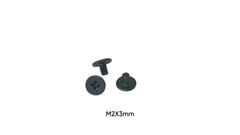
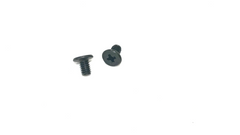
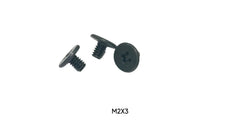
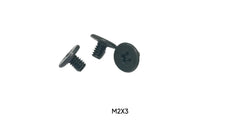
- Common lengths: 3–6mm in laptops; M2 x 3mm is the standard M.2 SSD screw
- Driver: Phillips PH00 or PH000
An M2 screw is a metric fastener with a 2-millimeter nominal diameter, representing one of the smallest screw sizes commonly used in consumer electronics and precision devices. This specific size bridges the gap between the even smaller M1.6 screws found in smartphones and the larger M2.5 screws used in standard laptops.
Shop M2 screws by size
 M2 x 3mm NVMe / M.2 SSD Screws, 50-PackView & buy →
 M2 x 4mm Flat Head Screws, 50-PackView & buy →
 M2 x 3mm Laptop Motherboard ScrewsView & buy →
 Laptop Screw Assortment (M1.2 to M3)View & buy →
 M2 x 3mm NVMe / M.2 SSD Screws, 100-PackView & buy →
Measured something else? Browse laptop internal screws, all M.2 SSD screws & standoffs, or use the Screw Size Finder.
Individuals search for M2 screw identification information when they need to replace a single lost fastener from a laptop or electronic device, verify compatibility before ordering replacement hardware, or determine whether an existing screw matches their repair requirements. Accurate identification prevents ordering incorrect sizes and ensures proper fit.
Defining M2 Screw Characteristics
The "M" prefix denotes metric threading, distinguishing these screws from imperial sizes like 2-56 or 3-48. The number "2" specifies the nominal outer diameter of the screw's threads in millimeters. When measured with precision calipers, an M2 screw's thread diameter should read approximately 2.0mm.
Thread pitch for standard M2 screws measures 0.4mm, representing the distance between adjacent thread peaks. This specification means one complete clockwise rotation advances the screw exactly 0.4mm deeper into the threaded hole.
The minor diameter—the measurement across the screw's core beneath the threads—typically measures around 1.6mm for M2 screws. This dimension affects the screw's tensile strength and determines the appropriate drill bit size for creating threaded holes.
Why Precise M2 Screw Identification Matters
Using an incorrectly sized screw in place of an M2 can cause immediate damage to electronic devices. An M1.6 screw (1.6mm diameter) will fit loosely in an M2 hole, providing inadequate clamping force and allowing components to shift or vibrate loose.
Imperial screws with similar diameters create dangerous confusion. A 2-56 screw measures approximately 2.18mm in diameter—close enough to an M2 to appear compatible at first glance. However, the different thread pitch prevents proper engagement, leading to cross-threading.
Accurate Measurement Methods
Digital calipers provide the most reliable method for measuring M2 screw diameter. Open the caliper jaws and position them across the screw's threads at the widest point. A reading between 1.98mm and 2.02mm confirms M2 sizing.
Thread pitch measurement requires either a thread pitch gauge or careful manual counting. For manual verification, mark a starting thread, count exactly 10 threads forward, and measure the distance—it should equal 4mm for an M2 screw with 0.4mm pitch.
Length measurement varies by head type. Pan head, button head, and round head screws measure from the underside of the head to the tip. Flat head (countersunk) screws measure from the top of the head.
Common M2 Screw Applications
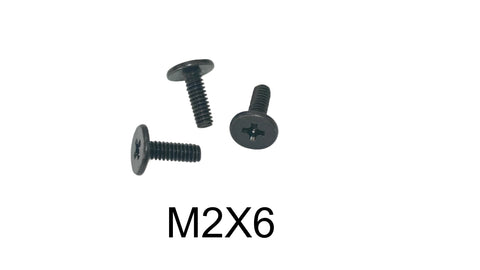
Laptop computers use M2 screws for securing motherboards to standoffs, retaining internal component shields, and mounting small brackets. Ultrabooks and compact laptops rely heavily on M2 screws due to limited internal space. Typical lengths range from 3mm to 6mm.
M.2 SSD mounting is one of the most common M2 screw applications: the tiny screw that secures an NVMe or SATA M.2 drive to its motherboard standoff is an M2 x 3mm in most desktop and laptop designs. If yours went missing, we sell the M2 x 3mm NVMe screw singly and in a 100-pack, and our M.2 SSD screws and standoffs collection has other exact-fit replacements.
Portable electronics including tablets, e-readers, and portable gaming devices employ M2 screws for case assembly and internal component mounting. These applications require screws that provide adequate retention while fitting within extremely compact housings.
Precision instruments, small cameras, drones, and hobby electronics use M2 screws for assembling lightweight structures and securing delicate components.
Head Styles and Drive Types
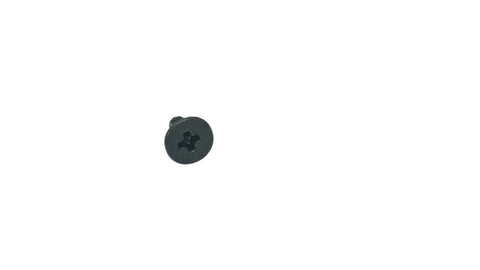
Pan head M2 screws feature a flat bearing surface with a slightly domed top, providing good clamping force distribution across thin materials. Phillips (PH00 or PH000) and slotted drives are most common.
Socket head cap screws in M2 size offer higher strength with a cylindrical head and hex socket drive, typically 1.5mm. These screws suit applications requiring significant clamping force.
Flat head (countersunk) M2 screws create flush surfaces when installed in properly countersunk holes. This style prevents snagging in compact electronics and improves aesthetics.
Identifying M2 Versus Similar Sizes
Confusing M2 screws with M1.6 screws occurs frequently because the 0.4mm diameter difference is nearly impossible to judge visually. Measurement remains the only reliable verification method.
Mistaking M2 screws for M2.5 screws creates problems during installation. The M2.5 screw's 2.5mm diameter appears similar, and both sizes commonly appear in laptop computers. Always verify both diameter and thread pitch.
Material and Coating Options
Steel M2 screws offer excellent strength and represent the most economical option for general applications. Zinc plating provides basic corrosion resistance adequate for indoor electronics.
Stainless steel M2 screws resist corrosion in humid or outdoor environments. The material's non-magnetic properties benefit installations near sensitive electronics or magnetic sensors.
Brass M2 screws provide electrical conductivity and corrosion resistance, making them suitable for grounding applications and devices exposed to moisture.
Selecting Correct M2 Screw Length
Length selection depends on the total thickness of materials being joined plus the required thread engagement depth. For M2 screws, minimum thread engagement should equal 1.5 times the screw diameter (3mm), though 4mm or more provides better security.
Calculate required length by adding material thickness and desired thread engagement, then selecting the next available standard length.
Screws that are too long risk damaging components beneath the mounting surface. Screws that are too short may not engage sufficient threads, leading to weak connections.
Installation Best Practices
Use properly sized screwdrivers to prevent cam-out and head damage. For Phillips M2 screws, a PH00 or PH000 driver provides correct fit.
Start threading by hand when possible, rotating counter-clockwise until feeling the thread drop into the threaded hole, then proceed clockwise. This technique ensures proper thread alignment.
Apply minimal installation torque. M2 screws in electronics typically require only 0.15 to 0.3 Nm of torque. Hand-tightening with a properly sized screwdriver provides adequate force.
Common Installation Mistakes
Cross-threading occurs when installation begins with misaligned threads or at an angle. If resistance increases suddenly during installation, back the screw out completely and restart.
Using excessive force during installation strips threads in plastic mounting posts or brass inserts. M2 screws require very little torque to achieve secure retention.
Mixing M2 screws with M1.6 or M2.5 screws during reassembly creates immediate problems. Always verify screw size before installation.
Replacement Screw Compatibility
Aftermarket M2 screws manufactured to ISO metric standards will function identically to original equipment screws when diameter, thread pitch, and length match correctly.
Head style substitution is possible if the replacement head fits within available clearance. Ensure the drive type matches available tools or be prepared to use different screwdrivers.
Shop M2 Replacement Screws
Once you've identified your screw, find the exact replacement in our collections: M.2 SSD screws & standoffs for drive mounting, or use the Screw Size Finder to match any M2 screw by length and application. Orders over $10 ship free from South Carolina, USA.
Conclusion
Accurate M2 screw identification requires measuring both diameter and thread pitch to distinguish this size from similar metric and imperial fasteners. Understanding the 2mm diameter and 0.4mm pitch specifications enables confident screw selection for electronics repairs. Proper measurement techniques and awareness of common identification errors prevent the component damage and assembly failures that result from using incorrect fasteners in compact electronic devices.
Not sure whether yours is M2, M2.5 or M3? Compare them in M2 vs M2.5 vs M3 screws: how to tell them apart.
Get the complete kit: new NVMe drives rarely include the mounting screw, and boards differ in which length they need. The M.2 SSD Install Kit has 4× M2 x 3mm and 4× M2 x 4mm screws, so you have the right length for a standard standoff or a taller, heatsink-equipped slot, plus spares for the next build.