Quick answer
- M3 screws represent one of the most versatile fastener sizes in electronics assembly, computer hardware, and precision equipment.
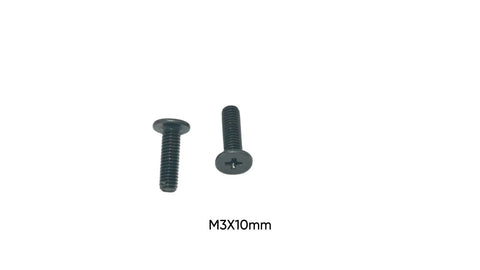
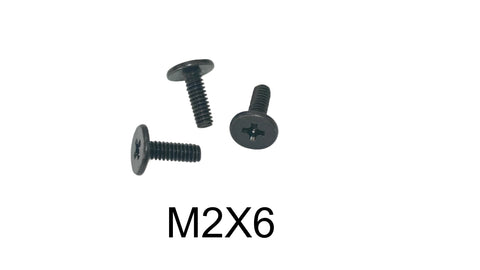
- The "M3" designation indicates a metric screw with a 3mm nominal diameter, making it larger than the M2 and M2.5 screws common in compact devices but smaller than M4 and M5 screws used in heavier applications.
M3 screws represent one of the most versatile fastener sizes in electronics assembly, computer hardware, and precision equipment. The "M3" designation indicates a metric screw with a 3mm nominal diameter, making it larger than the M2 and M2.5 screws common in compact devices but smaller than M4 and M5 screws used in heavier applications.
Technicians and DIY repair enthusiasts search for M3 screw information when working on desktop computers, larger laptops, external hard drives, networking equipment, and various consumer electronics. These screws secure components ranging from expansion cards to drive bays, requiring accurate size matching for successful repairs.
Defining M3 Screw Specifications
An M3 screw measures 3mm in nominal outer thread diameter. The actual measurement typically reads between 2.98mm and 3.00mm due to manufacturing tolerances. This size provides significantly more holding strength than M2 or M2.5 screws while remaining small enough for compact electronic assemblies.
The standard thread pitch for M3 screws is 0.5mm, meaning each complete rotation advances the screw 0.5mm along its axis. This coarse thread pitch offers good resistance to vibration loosening and works well in both metal and reinforced plastic materials. Fine-pitch M3 screws exist but are uncommon in consumer electronics.
Thread engagement depth should equal at least 1.5 times the screw diameter for adequate holding strength. For M3 screws, this translates to minimum 4.5mm of thread engagement, though 6mm or more provides better security in critical applications.
Common Length Ranges and Variations
M3 screws are manufactured in lengths from 3mm to 50mm or longer, though electronics applications typically use screws between 4mm and 16mm. The length measurement starts from different points depending on head style—from the underside of the head for pan, button, and round heads, or from the top surface for countersunk heads.
Short M3 screws (4mm to 6mm) secure thin components like expansion card brackets, small mounting plates, and surface-mounted hardware. Medium lengths (8mm to 12mm) handle drive bay installations, motherboard standoffs, and case panel attachments. Longer screws (14mm to 20mm) accommodate stacked components or pass through thick materials.
Partially threaded M3 screws feature a smooth shank section below the head, with threads only on the lower portion. These screws allow components to sit flush against mounting surfaces while the threads engage only with the receiving material, reducing binding and improving alignment.
Head Styles for Different Applications
Pan head M3 screws provide a low-profile option with a flat bearing surface and slightly rounded top. These screws work well for general-purpose electronics assembly where appearance is secondary to function. The wide head distributes clamping force effectively across thin materials.
Countersunk (flat head) M3 screws sit flush with or below the mounting surface when installed in appropriately sized countersunk holes. This head style prevents snagging and creates smooth surfaces, important for sliding components or aesthetic considerations. Phillips and hex socket drives are common for countersunk M3 screws.
Button head and socket head cap screws offer higher-strength options for M3 applications requiring significant clamping force. The cylindrical head with hex socket drive allows greater installation torque than Phillips or slotted drives, though the taller head profile may not suit all applications.
Electronics and Computer Hardware Applications
Desktop computer cases use M3 screws extensively for securing motherboards to standoffs, mounting expansion cards, attaching drive cages, and fastening power supplies. The 6-32 imperial screw (approximately 3.5mm diameter) sometimes appears in computer hardware, but M3 screws dominate modern systems.
External storage devices, including hard drive enclosures and RAID arrays, rely on M3 screws to secure drives to mounting brackets and attach circuit boards to chassis. These applications typically use 5mm to 8mm lengths with pan or button heads.
Networking equipment like routers, switches, and access points employ M3 screws for rack mounting brackets, internal component retention, and case assembly. The vibration resistance of M3 threads makes them suitable for equipment in data centers and industrial environments.
Proper Size Identification Methods
Measuring M3 screw diameter requires precision calipers or a screw gauge. Place the caliper jaws across the outer threads at the screw's widest point. A reading of 2.98mm to 3.00mm confirms M3 sizing. Measurements significantly above or below this range indicate a different screw size.
Thread pitch verification uses a thread pitch gauge or involves counting threads within a measured distance. For M3 screws with 0.5mm pitch, exactly 2 threads should span 1mm of length. Counting 10 threads should measure 5mm from the first thread peak to the tenth.
Length measurement technique depends on head style. For pan and button heads, measure from directly under the head to the screw tip. For countersunk heads, measure from the top of the head to the tip. Use millimeter measurements exclusively to avoid conversion errors.
Installation Errors to Avoid
Forcing M3 screws into M2.5 or M2 holes causes immediate thread damage. While an M3 screw may initially seem to fit, the diameter mismatch strips threads in the receiving material, creating loose, unreliable connections. Always verify hole size before installation.
Excessive installation torque strips threads in plastic materials and can shear screw heads in metal applications. M3 screws in electronics typically require only 0.4 to 0.6 Nm of torque. Hand-tightening with a properly sized screwdriver provides adequate force for most applications.
Using screws that are too long risks damaging components beneath the mounting surface. Circuit boards, in particular, are vulnerable to puncture from protruding screw tips. Always verify that screw length does not exceed the available depth, accounting for any washers or spacers.
Material and Finish Options
Steel M3 screws offer the best strength-to-cost ratio for general electronics applications. Zinc plating provides basic corrosion resistance suitable for indoor use. Black oxide finishes reduce reflectivity and offer minimal corrosion protection, primarily serving aesthetic purposes.
Stainless steel M3 screws resist corrosion in humid environments or outdoor applications. The material's lower magnetic properties benefit installations near sensitive electronics. Stainless steel is softer than hardened steel, making threads more susceptible to damage from over-tightening.
Aluminum M3 screws reduce weight in portable electronics and aerospace applications. The material's softness requires careful installation to prevent thread stripping. Anodized finishes provide corrosion resistance and color options for visible installations.
Replacement Versus Original Equipment Screws
Replacement M3 screws manufactured to ISO metric standards will function identically to original equipment screws when diameter, length, and thread pitch match. The key specification is dimensional accuracy, not brand or origin.
Head style and drive type may differ between replacement and original screws without affecting function. A Phillips pan head M3 screw can replace a hex socket pan head M3 screw of the same length, though the drive tool changes. Ensure the replacement head style fits the available clearance.
Thread-locking compounds enhance security for M3 screws in vibration-prone applications. Removable-strength formulas (typically blue) allow future disassembly while preventing loosening during operation. Apply sparingly to avoid excess compound interfering with proper thread engagement.
Conclusion
M3 screws provide reliable fastening for a wide range of electronics and computer hardware applications. Understanding size specifications, length requirements, and proper installation techniques ensures successful repairs and assemblies. Accurate identification and careful selection prevent the component damage and assembly failures that result from using incorrect fasteners. Verifying dimensions before installation and applying appropriate torque protects both the screws and the equipment they secure.