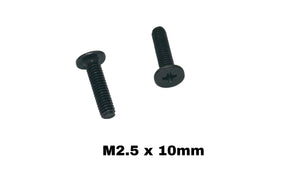
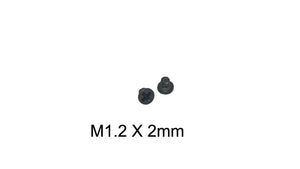
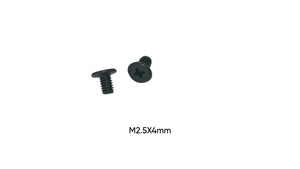
Laptop motherboard screws secure the main circuit board to the chassis, providing both mechanical stability and electrical grounding. These fasteners must be removed during repairs involving RAM upgrades, cooling system maintenance, or motherboard replacement, making proper identification and handling essential for successful laptop servicing.
Technicians and DIY repair enthusiasts search for motherboard screw information when disassembling laptops for component upgrades, thermal paste replacement, or troubleshooting hardware failures. Lost or stripped screws during these procedures can complicate reassembly and compromise the laptop's structural integrity.
Motherboard Screw Size Specifications
Most laptop motherboards use M2 screws or M2.5 screws, with M2 being more common in ultrabooks and compact models, while M2.5 screws appear in larger laptops and mobile workstations. The screw diameter directly correlates with the laptop's size and weight—smaller, lighter devices use smaller screws to minimize weight and maximize internal space.
Thread pitch for M2 motherboard screws typically measures 0.4mm, while M2.5 screws use 0.45mm pitch. This fine threading provides secure engagement in the brass or steel threaded inserts embedded in the laptop's chassis. For detailed specifications on small metric screws, refer to our comprehensive sizing guide.
Screw length varies significantly depending on mounting location. Screws securing the motherboard directly to the bottom case typically measure 3mm to 5mm in length. Screws that pass through mounting brackets or reinforcement plates may extend to 6mm or 8mm to accommodate the additional material thickness.
Screw Location and Function Variations
Perimeter screws around the motherboard's edges provide primary retention, preventing the board from flexing or shifting during normal use. These screws typically number between 6 and 12, depending on motherboard size. They thread into brass standoffs or directly into threaded inserts in the chassis.
Central mounting screws, positioned near the CPU socket or other heavy components, provide additional support and help maintain even pressure distribution across the motherboard. These screws prevent board warping that could stress solder joints or damage surface-mounted components.
Grounding screws serve dual purposes—mechanical retention and electrical grounding. These screws often feature star washers or grounding springs that ensure reliable electrical contact between the motherboard's ground plane and the metal chassis, essential for EMI shielding and static discharge protection.
Head Styles and Drive Types
Phillips pan head screws dominate laptop motherboard applications due to their low profile and resistance to cam-out during installation. The pan head's wide bearing surface distributes clamping force effectively without damaging the motherboard's solder mask or surface-mounted components near screw holes.
Some manufacturers use Torx screws for motherboard retention, particularly in business-class and premium consumer laptops. T5 and T6 Torx sizes are most common, offering better torque transfer than Phillips drives and providing mild tamper resistance to discourage unauthorized repairs.
Hex socket screws appear occasionally in gaming laptops and mobile workstations where higher installation torque is desired. These screws typically use 1.5mm or 2mm hex sockets, requiring precision drivers to avoid stripping the socket.
Identifying Correct Screw Sizes
Visual inspection can distinguish between M2 and M2.5 screws when comparing them side by side, but measurement provides definitive identification. Use digital calipers to measure the thread diameter—M2 screws measure 2.0mm, while M2.5 screws measure 2.5mm. This 0.5mm difference is significant enough to prevent interchangeability.
Length measurement requires attention to head style. For pan head screws, measure from the underside of the head to the screw tip. Organize removed screws by location during disassembly, as different mounting points often require different lengths even when diameter remains consistent. Check our laptop screw size chart for a complete reference.
Thread pitch verification helps confirm screw type when diameter measurements fall within tolerance ranges. Count the number of threads within a 2mm span—M2 screws with 0.4mm pitch will have 5 threads, while M2.5 screws with 0.45mm pitch will have approximately 4.4 threads in the same distance.
Removal Techniques to Prevent Damage
Apply appropriate downward pressure while turning the screwdriver to prevent cam-out, which can strip screw heads. Phillips screws require firm pressure directly in line with the screw axis. Insufficient pressure allows the driver to ride up out of the screw head, damaging the drive recess.
Screws secured with thread-locking compound may require additional force to break free. If a screw resists initial turning, verify you're rotating counter-clockwise and increase torque gradually. Excessive force applied suddenly can shear screw heads, particularly on M2 screws with limited shank diameter.
Magnetic screwdrivers help retain small motherboard screws during removal, preventing them from falling into the laptop chassis or being lost. However, avoid using strong magnets near the motherboard itself, as they can damage certain components or affect magnetic sensors.
Installation Best Practices
Start all screws by hand, turning counter-clockwise until you feel the thread drop into place, then proceed clockwise. This technique ensures proper thread alignment and prevents cross-threading, which permanently damages the threaded inserts in the laptop chassis.
Tighten screws in a star or cross pattern when multiple screws secure the motherboard, similar to wheel lug nut tightening. This approach distributes clamping force evenly and prevents board warping. Begin with finger-tight installation, then apply final torque in the same pattern.
Avoid over-tightening, which can crack the motherboard substrate, strip threads in brass inserts, or deform the chassis. Motherboard screws require minimal torque—typically 0.2 to 0.4 Nm for M2 screws and 0.3 to 0.5 Nm for M2.5 screws. Hand-tightening with a properly sized screwdriver provides adequate force.
Common Screw-Related Problems
Stripped screw heads result from using incorrect screwdriver sizes, applying insufficient downward pressure, or attempting removal with worn drivers. If a screw head strips during removal, try a slightly larger driver, use a rubber band between the driver and screw for added grip, or carefully apply a screw extractor.
Cross-threaded screws occur when installation begins at an angle or with misaligned threads. The screw may seem to tighten initially but will bind and potentially crack the motherboard or strip the insert. If resistance increases suddenly during installation, back the screw out completely and restart the threading process.
Missing screws after reassembly indicate either lost fasteners or incorrect screw mapping during disassembly. Operating a laptop with missing motherboard screws allows excessive board flex, potentially cracking solder joints or damaging components. Always account for every screw removed.
Screw Organization During Repairs
Photograph screw locations before removal, or create a diagram showing screw positions and lengths. Different mounting points often require specific screw lengths, and mixing them during reassembly can result in screws that are too short (inadequate retention) or too long (component damage).
Use compartmented containers or magnetic parts trays to organize screws by location or length. Label each compartment with the corresponding motherboard area or screw specification. This organization prevents confusion during reassembly and reduces the risk of using incorrect screws.
Keep motherboard screws separate from other laptop screws removed during disassembly. Case screws, hinge screws, and drive mounting screws may appear similar but often have different lengths or thread pitches. Mixing screw types leads to installation problems and potential damage.
Replacement Screw Considerations
Aftermarket motherboard screws must match the original specifications exactly—diameter, thread pitch, and length. A properly sized replacement M2.5 x 4mm screw will function identically to the factory screw, regardless of finish or head marking differences.
Material selection affects durability and electrical properties. Steel screws provide adequate strength for most applications. Stainless steel offers corrosion resistance for laptops used in humid environments. Avoid aluminum screws for motherboard mounting, as the soft material strips easily and provides poor electrical grounding.
Head style substitution is possible if the replacement fits within available clearance and provides adequate bearing surface. A pan head screw can replace a button head screw of the same diameter and length, though the head profile differs slightly. Ensure the drive type matches available tools.
Shop Replacement Screws
Need replacement screws for your laptop motherboard? Check out our selection of precision screws:
- M2 × 4mm Phillips Flat Head Screws for SSD Mounting
- M2 × 5mm Phillips Flat Head Screws for Dell Inspiron
- M2.5 × 8mm Phillips Flat Head Screws
Conclusion
Laptop motherboard screws require careful identification, proper removal techniques, and precise installation to maintain system integrity. Understanding size specifications, recognizing the importance of correct screw placement, and using appropriate tools prevents the damage that results from stripped threads, cross-threading, or over-tightening. Organizing screws during disassembly and verifying specifications before reassembly ensures successful laptop repairs and upgrades.