Quick answer: DIY vs. Professional Repair: Which is Right for You?
| Factor | DIY Key Replacement |
|---|---|
| Cost | $5 - $15 for a replacement key kit. |
| Time | 5-10 minutes of your time once the part arrives. |
| Convenience | Repair your laptop from the comfort of your home. |
| Difficulty | Low. Requires patience but no special technical skills. |
That sinking feeling when a key pops off your Dell laptop is all too common. Whether it was a runaway crumb, an overzealous typing session, or a curious toddler, a missing key can disrupt your entire workflow. But here's the good news: you almost certainly do not need to replace the entire keyboard. A Dell keyboard key replacement is a simple, affordable fix you can do yourself in just a few minutes. This guide will walk you through every step, from identifying the parts you need to snapping that new key perfectly into place.
Is a Single Dell Keyboard Key Replacement Even Possible?
Absolutely. In fact, it's one of the most common laptop repairs. Laptop keyboards are designed with individual key assemblies. This modular design means that when one key fails, it doesn't spell disaster for the entire unit. Replacing a single keycap is far more cost-effective and sustainable than swapping out the whole keyboard assembly.
The key (pun intended) is to understand what parts you're working with and to source the correct replacement. For a few dollars and a little bit of patience, you can have your keyboard looking and feeling brand new.
Identifying Your Dell Keyboard Key Type (The Crucial First Step)
Before you can order a replacement, you must identify the exact type of key mechanism your Dell laptop uses. While the letters on the keycaps are standardized, the plastic machinery underneath is not. Different Dell models (like Inspiron, Latitude, XPS) and even different generations of the same model can have unique key designs.
A single key is composed of three parts:
- The Keycap: This is the plastic square with the letter on it that you actually touch.
- The Retainer Clip: Also called a hinge, this is the delicate, often white or black, plastic scissor-like mechanism that snaps onto the keyboard base and holds the keycap. This is the most critical part to identify correctly.
- The Silicone Cup: A small, rubbery dome in the center that provides the spring-back action when you press the key. This is usually part of the keyboard itself and doesn't often need replacing.
To identify your retainer clip, you'll need to carefully remove the broken keycap (if it hasn't fallen off already) and take a clear photo of the hinge underneath. Compare this photo to the images on a supplier's website to ensure you order a perfect match.
How to Remove a Broken Dell Keyboard Key (Safely!)
If the keycap is still partially attached, you need to remove it without damaging the delicate retainer clip underneath or the metal hooks on the keyboard base. Patience is your best friend here.
- Power Down: Turn off your Dell laptop completely to avoid any accidental commands.
- Find Your Tool: Use a thin, flat, and non-metallic tool. A guitar pick, a plastic spudger, or even just your fingernail can work perfectly. Avoid using a metal screwdriver, as it can easily scratch the keyboard or break the plastic clips.
- Pry Gently: Start at one of the top corners. Slide your tool under the edge of the keycap and gently twist or lift. You are trying to unhook it from the retainer clip.
- Listen for the Click: You should hear a faint "snap" or "click" as the keycap detaches from the clip. Work your way around to the other corners if needed.
- Inspect the Area: Once the cap is off, look closely at the retainer clip. Is it still intact? Are all the pieces there? Is the central silicone cup undamaged? This will determine what parts you need to order.
Finding the Right Replacement Key: A Buyer's Guide
The success of your Dell keyboard key replacement hinges entirely on getting the correct part. The most important piece of information is the full model number of your Dell laptop (e.g., "Dell Inspiron 15 5552" or "Dell Latitude E5570"). This is usually printed on a label on the bottom of the laptop case.
Once you have your model number and a clear picture of the retainer clip, you're ready to find your part. At Tech Spare Warehouse, we make this process easy. Our product pages show clear images of the hinge types so you can buy with confidence.
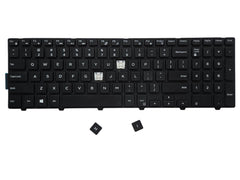
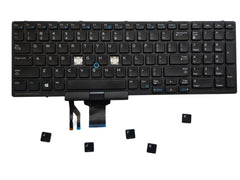
For example, consumer-grade laptops often need a specific key type. If you have an Inspiron, you would search for a kit like our Individual Keycap Replacement for Dell Inspiron 15 5552 / 17 5759. Business-class models like the Latitude series use different components, requiring a specific kit like the key cap replacement for Dell Latitude E5550 and Precision 7520. Sourcing the right part is half the battle, and we have a wide selection to cover your needs.
We pride ourselves on carrying a huge inventory of parts for all major brands, not just Dell. Whether you need replacement keys for an HP laptop or need to fix a key on a Samsung Ultrabook, our store is the best place to start your search.
Step-by-Step Guide: Installing Your New Dell Key
Your new key kit has arrived. Let's get it installed. The process differs slightly depending on whether you also need to replace the retainer clip.
If the Retainer Clip is Intact and in Place:
This is the dream scenario. Your job is easy.
- Align the New Keycap: Simply position the new keycap directly over the existing retainer clip. Make sure it’s oriented correctly.
- Press to Snap: Starting with the top edge, press down firmly but gently. Then press the bottom edge. You should hear and feel two or more distinct "snaps" as the keycap locks onto the hinge.
- Test It: Press the key a few times to ensure it depresses smoothly and has the proper spring-back action.
If You Need to Replace the Retainer Clip:
This is a bit more delicate but still very manageable. Most retainer clips come in two pieces that fit together to form the "scissor" mechanism.
- Remove Old Clip: Carefully remove any broken pieces of the old clip from the keyboard base. Be mindful of the small metal hooks on the base—don't bend them!
- Assemble the New Clip: Snap the two new pieces of the retainer clip together. They should pivot freely in the middle.
- Attach to Keyboard: This is the trickiest part. Look at the keyboard base; there will be small metal loops or hooks (usually one or two at the bottom, one or two at the top). You need to slide the corresponding bars of the retainer clip into these hooks. It may take a couple of tries to get it right.
- Lock the Clip: Once the clip is hooked in, gently press it down flat against the base. It should click into place and lie perfectly flat.
- Install the Keycap: Follow the steps in the previous section to align and snap the new keycap onto the newly installed retainer clip.
DIY vs. Professional Repair: Which is Right for You?
Still on the fence? For a single key replacement, DIY is almost always the best option. But let's break down the comparison.
| Factor | DIY Key Replacement | Professional Repair |
|---|---|---|
| Cost | $5 - $15 for a replacement key kit. | $50 - $150+, including parts, labor, and diagnostic fees. |
| Time | 5-10 minutes of your time once the part arrives. | Can take several hours to several days, depending on the shop's backlog. |
| Convenience | Repair your laptop from the comfort of your home. | Requires travel to a repair shop and being without your device. |
| Difficulty | Low. Requires patience but no special technical skills. | N/A. Done by a technician. |
Common Mistakes to Avoid During Key Replacement
While the process is straightforward, a few common errors can make it frustrating. Be sure to avoid these pitfalls:
- Using Too Much Force: The components are delicate plastic. If something doesn't fit, don't force it. Re-examine the alignment and try again gently. Brute force will break the new clip or the hooks on the keyboard itself.
- Ordering the Wrong Hinge Type: This is the #1 mistake. Double and triple-check that the retainer clip in the product photo exactly matches the one on your keyboard.
- Ignoring a Damaged Base: If the metal hooks on the keyboard base are bent or broken, a new clip won't attach securely. In this rare case, a full keyboard replacement might be necessary.
- Using Super Glue: Never, ever use super glue. It will seize the mechanism, ruin the keyboard base, and make a proper repair impossible. If you use glue, you will almost certainly need to buy a whole new keyboard assembly.
Conclusion: Type Confidently on Your Restored Dell Keyboard
A missing or broken key doesn't have to be a major expense or inconvenience. With the right part and a little patience, completing a Dell keyboard key replacement is an empowering and satisfying DIY project. By following the steps to identify, remove, and install a new key, you can restore your keyboard to perfect working order in minutes. You've saved money, reduced waste, and extended the life of your trusty Dell laptop.
Ready to get started on your next repair? For all your Dell spare part needs, from keyboard keys to screws and beyond, browse our full inventory. Find everything you need at Tech Spare Warehouse!
Frequently Asked Questions
Can I replace just one key on my Dell laptop keyboard?
Yes, in most cases you can replace a single keycap, retainer clip, or both, which is much cheaper than replacing the entire keyboard assembly.
How much does it cost to replace a Dell keyboard key?
A single replacement key kit is very affordable, typically costing between $5 and $15. A professional repair or full keyboard replacement would be significantly more expensive.
Are all Dell keyboard keys the same?
No. Different Dell models (Inspiron, Latitude, XPS, etc.) use different key sizes and, most importantly, different plastic retainer clip mechanisms. You must match your specific laptop model and hinge type.
What tools do I need for a Dell key replacement?
You typically only need a thin, non-marring pry tool like a spudger, a guitar pick, or even a fingernail. No special tools are required for a single key replacement.
What if the plastic clips under the key are broken?
If the retainer clip (hinge) is broken, you need to order a replacement kit that includes both the keycap and the retainer clip assembly. You can then replace both parts by following the steps in this guide.
Can I use super glue to fix a broken key?
No, you should never use super glue. It can permanently damage the delicate retainer clip mechanism and the keyboard base, making a proper repair impossible and likely forcing a full keyboard replacement.
Where can I buy Dell replacement keys?
You can find individual key replacement kits from specialized online retailers like Tech Spare Warehouse. We offer a wide variety of key kits for specific Dell models, such as the Dell Inspiron 15 5552 kit or the one for the Dell Latitude E5550, to ensure a perfect fit.