Quick answer: DIY vs. Pre-Made Feet: A Quick Comparison
| Feature | Pre-Made Replacement Feet |
|---|---|
| Fit & Finish | Perfect, model-specific fit. Professional look. |
| Adhesion | Strong, pre-applied 3M adhesive designed for the task. |
| Height & Airflow | Engineered to the exact height needed for proper cooling. |
| Durability | Made from durable, non-marking synthetic rubber. |
Is your laptop sliding around your desk like a hockey puck? Those small, often-forgotten pads on the bottom of your device are the cause. These essential components, known as laptop rubber feet, are critical for stability, preventing scratches, and ensuring proper airflow to keep your machine cool. Losing one or more is common, but ignoring the problem can lead to overheating and poor ergonomics. The great news is that replacing them is one of the easiest and most affordable DIY laptop repairs you can do.
What Are Laptop Rubber Feet and Why Are They So Important?
Laptop rubber feet, sometimes called bumper pads or bottom case feet, are small rubber or silicone pads affixed to the underside of your laptop. While they may seem insignificant, they serve several vital functions that protect your device and improve your user experience.
- Grip and Stability: Their primary job is to keep your laptop firmly in place. This prevents it from sliding on smooth surfaces, which could lead to an accidental drop or a frustrating user experience.
- Elevation and Airflow: The feet slightly lift your laptop off the desk surface. This tiny gap is a critical part of your laptop's cooling system. It allows for 360-degree air intake for the internal fans, helping to dissipate heat more effectively. Without them, your laptop sits flush, trapping heat and forcing the fans to work overtime, which can lead to performance throttling and a shorter lifespan for your components.
- Vibration Dampening: The soft material absorbs minor vibrations from the internal hard drive (on older models) and cooling fans, resulting in a quieter operation.
- Surface Protection: They act as a buffer, preventing the hard plastic or metal case of your laptop from scratching your desk or tabletop, and vice-versa.
Signs Your Laptop's Rubber Feet Need Replacing
It's usually quite obvious when a foot is missing, but sometimes the signs of wear are more subtle. Here are the tell-tale signs that it’s time for a replacement:
- The Wobble Test: Your laptop rocks or wobbles when you type.
- Unwanted Movement: The slightest nudge sends your laptop sliding across the desk.
- Visible Damage: The feet are peeling, flattened, hardened, or gooey from degradation.
- Increased Fan Noise: Your fans seem louder or are running more frequently than usual, a possible sign of restricted airflow from a lack of elevation.
- New Scratches: You notice scratches on your work surface that weren't there before.
How to Replace Laptop Rubber Feet: A Step-by-Step Guide
Replacing your laptop rubber feet is a simple, five-minute task that anyone can do. Follow these steps for a perfect, long-lasting application.
Step 1: Get the Right Supplies
First, you'll need the correct replacement feet for your specific laptop model. You'll also need a few common household items:
- Replacement Feet: Model-specific feet are always the best choice.
- Isopropyl Alcohol (70% or higher): For cleaning the surface.
- Cotton Swabs or a Microfiber Cloth: For applying the alcohol.
- A Plastic Spudger or Old Credit Card: To help remove the old, stubborn adhesive. Avoid metal tools which can scratch your laptop's case.
Step 2: Remove the Old Feet and Adhesive
If the old foot is still partially attached, gently pry it off. Then, focus on the adhesive residue. Apply a small amount of isopropyl alcohol to a cotton swab and gently rub the area in a circular motion. The adhesive should start to dissolve and ball up. Use your plastic spudger or the edge of a credit card to scrape away any stubborn bits. Be patient and gentle to avoid damaging the case.
Step 3: Clean the Surface Thoroughly
Once all the old gunk is gone, use a clean part of your cloth with a little more alcohol to wipe the entire recess where the new foot will sit. A perfectly clean, oil-free surface is the secret to a strong, permanent bond. Let it air dry completely for a minute or two.
Step 4: Apply the New Laptop Rubber Foot
Modern replacement feet come with a pre-applied, high-quality adhesive. Simply peel the protective backing off the new foot. Carefully align it in the recess on the laptop's case and press down firmly. Hold firm pressure for at least 30 seconds to ensure the adhesive makes a complete bond with the surface. Wiggle it slightly to ensure it’s seated correctly.
Where to Buy the Best Replacement Laptop Rubber Feet
While you can find generic options, we always recommend using feet designed for your specific model to guarantee a perfect fit, proper elevation, and long-term durability. At Tech Spare Warehouse, we stock high-quality replacement parts for a wide range of devices.
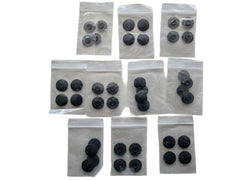
Finding the exact right part is a cornerstone of a successful repair. For instance, Apple laptops are notoriously precise. If you own an older unibody model, you'll need our 10-set pack of Bottom Base Rubber Feet for MacBook Pro A1278, A1286, and A1297. For newer models, the fit is different, which is why we carry specific Bottom Base Rubber Feet Pads for MacBook Retina A1425, A1502, and A1398.
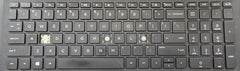
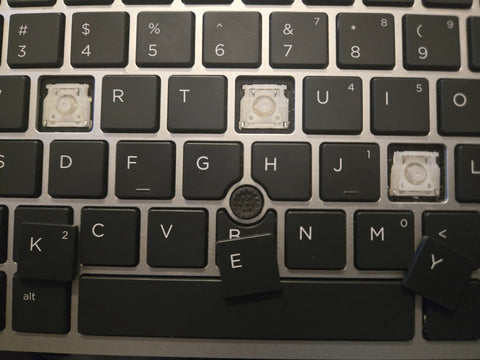
And our philosophy of empowering easy, affordable repairs extends to all parts. If you find that your keyboard is also showing its age, you don't need to replace the whole thing. You can get individual keycap replacements for HP laptops and many other brands directly from our store, saving you time and money.
DIY vs. Pre-Made Feet: A Quick Comparison
Tempted to just cut up a piece of rubber or use a blob of hot glue? We'd advise against it. Here’s a quick comparison of why pre-made is the way to go.
| Feature | Pre-Made Replacement Feet | DIY Solutions (Glue, Sugru, etc.) |
|---|---|---|
| Fit & Finish | Perfect, model-specific fit. Professional look. | Often uneven, messy, and unprofessional. |
| Adhesion | Strong, pre-applied 3M adhesive designed for the task. | Can be weak, messy, or permanently bond in a way that damages the case. |
| Height & Airflow | Engineered to the exact height needed for proper cooling. | Inconsistent height can create wobbles and impede airflow. |
| Durability | Made from durable, non-marking synthetic rubber. | Can degrade quickly, get gooey, or leave marks on surfaces. |
Conclusion: An Easy Fix for a Stable, Cool Laptop
Don't underestimate the importance of your laptop rubber feet. They are a simple, elegant solution for keeping your expensive device safe, stable, and cool. For just a few dollars and five minutes of your time, you can restore your laptop to its factory-fresh stability and protect it from the long-term damage of overheating. It’s one of the most cost-effective repairs you can make. Ready to give your laptop a solid footing? Find all the parts you need for this and other repairs at Tech Spare Warehouse!
Frequently Asked Questions
Can I use any rubber feet on my laptop?
While generic adhesive feet can work in a pinch, it's always best to use feet designed for your specific laptop model. This ensures the height is correct for proper airflow and the fit is perfect within the designated recess on the laptop's case.
Is super glue good for attaching laptop feet?
No, you should avoid using super glue (cyanoacrylate) or other harsh adhesives. They can permanently bond to the laptop's chassis, making future removal impossible without causing damage. High-quality replacement feet come with strong, pre-applied adhesive that is safe for the device.
How much do replacement laptop feet cost?
Replacement laptop feet are very affordable. A full set for a specific model typically costs between $5 and $15, making it a very low-cost repair with significant benefits.
My laptop has long rubber strips instead of feet. Can I replace those?
Yes, many laptops, especially modern ultrabooks, use long rubber strips for stability and airflow. Replacement strips for these models are also available and are applied using the same "clean, peel, and stick" method.
Why did my original laptop feet fall off?
Laptop feet can fall off due to a combination of heat from the laptop degrading the adhesive, oils from your hands or surfaces weakening the bond, and physical friction from sliding the laptop in and out of a bag.
How do I stop my new laptop feet from falling off?
To ensure your new feet stay put, make sure the surface is spotlessly clean with isopropyl alcohol before application. Press firmly for 30-60 seconds and, if possible, let the adhesive cure for a few hours before heavy use. Also, try to lift rather than slide your laptop on surfaces.
Besides stability, what is the most important function of laptop feet?
The most important secondary function is ensuring proper cooling. The gap created by the feet is essential for the laptop's fan(s) to draw in cool air. Without this gap, the laptop can overheat, leading to reduced performance and a shorter lifespan for internal components.
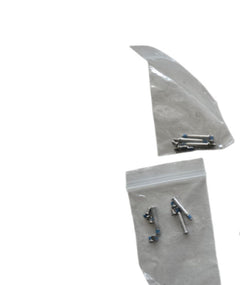
Get the complete kit: reviving a 2009–2012 Unibody MacBook Pro (A1278, A1286, A1297)? The MacBook Pro Unibody Complete Repair Bundle combines the bottom case screw set, 4 HDD/SSD mounting screws and a set of 4 rubber feet in one order.